Simplify Data Collection with Web Forms in ERPNext
In this guide, we’ll walk you through the step-by-step process of creating a web form in ERPNext — from setting up the Doctype to publishing the form on your website — along with practical use cases l
How to Create a Web Form in ERPNext
Web forms in ERPNext allow you to collect data directly from users through your website. For example, you can use them to gather feedback, collect reviews, or get customer inputs that are stored directly in your ERPNext database.
Step 1: Create a Doctype
Before creating a web form, make sure you have a Doctype with the fields you want to capture. The web form will be linked to this Doctype.
Step 2: Create a Web Form
You can create a web form directly from ERPNext by following these steps:
Navigation Path:
Home > Website > Web Form
- Go to Web Form and click on Add New Web Form.
- Select the Doctype you want to connect.
- Click on Fetch Fields to automatically pull the fields from the Doctype.
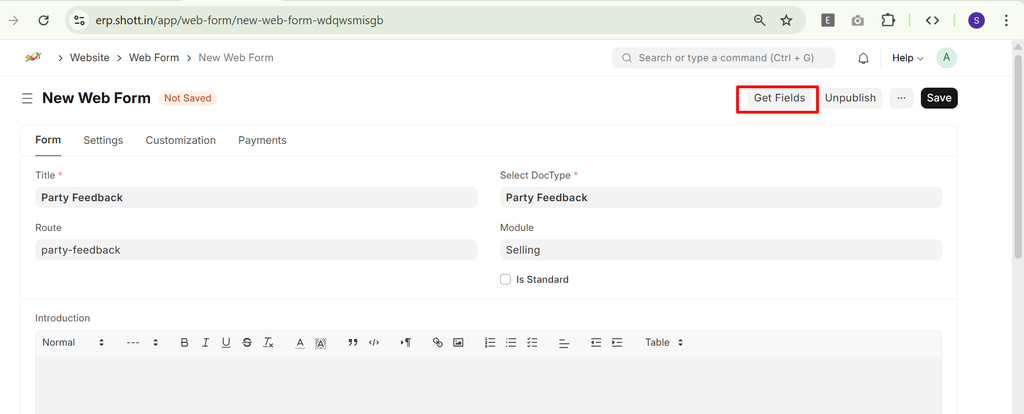
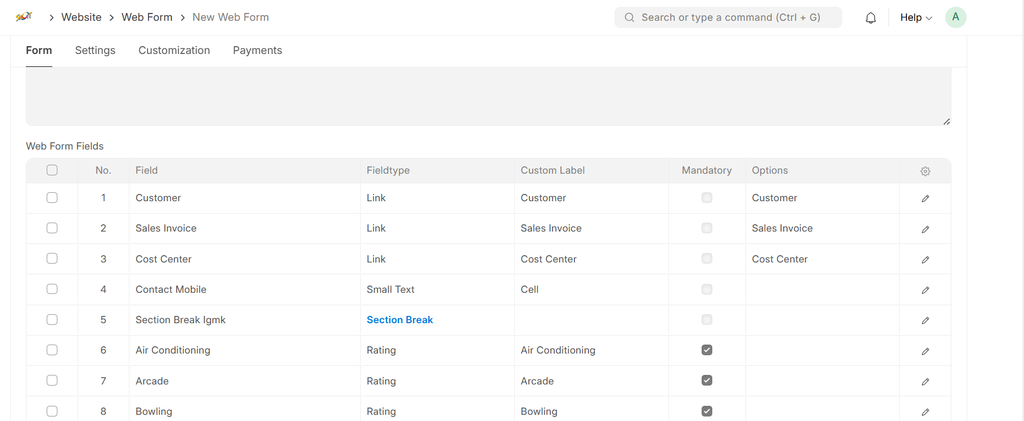
- Adjust the form fields if needed.
- Save the Web Form.
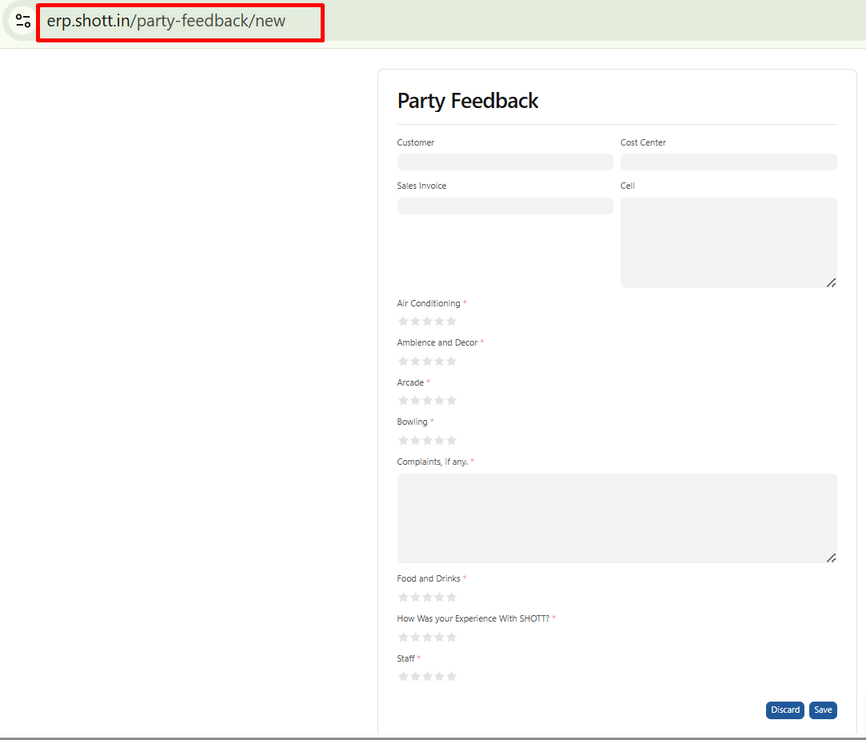
Once saved, you can review it by clicking See on Website. This will open the live version of your form.
Step 3: Use Cases for Web Forms
- Collect Feedback:
- For example, create a Party Feedback Form to gather feedback about an event you hosted.
- Collect Opinions / Reviews:
- Use web forms to collect customer opinions or reviews directly from your website.
Step 4: How To Generate a link of the Web Form.
- Copy the link comes after clicking on see on website. 'https://erp.greycube.in/party-feedback/new'
- Then, if you are going to set this link with any doctype, add {{doc.name}} to it. For example: Sales Invoice: https://erp.greycube.in/party-feedback/new?sales_invoice={{doc.name}}
- If you want to prefill additional details such as Customer or Cost Center, you can include them as query parameters as well. Linkhttps://erp.greycube.in/party-feedback/new?sales_invoice={{doc.name}}&customer={{doc.customer}}&cost_center={{doc.cost_center}}&contact_mobile={{doc.contact_mobile}}
No comments yet. Login to start a new discussion Start a new discussion